Welcome the FLY team to join us formally. We now have both FLY and NF teams. The FLY team will focus on the development of 3D printer electronic technology, and the NF team will focus on the development of 3D printer motion and printing technology. Combining the two, I believe we will do better.
For more detailed information or technical assistance, please contact us at the following website:https://github.com/FLYmaker/FLYF407ZG
Description:
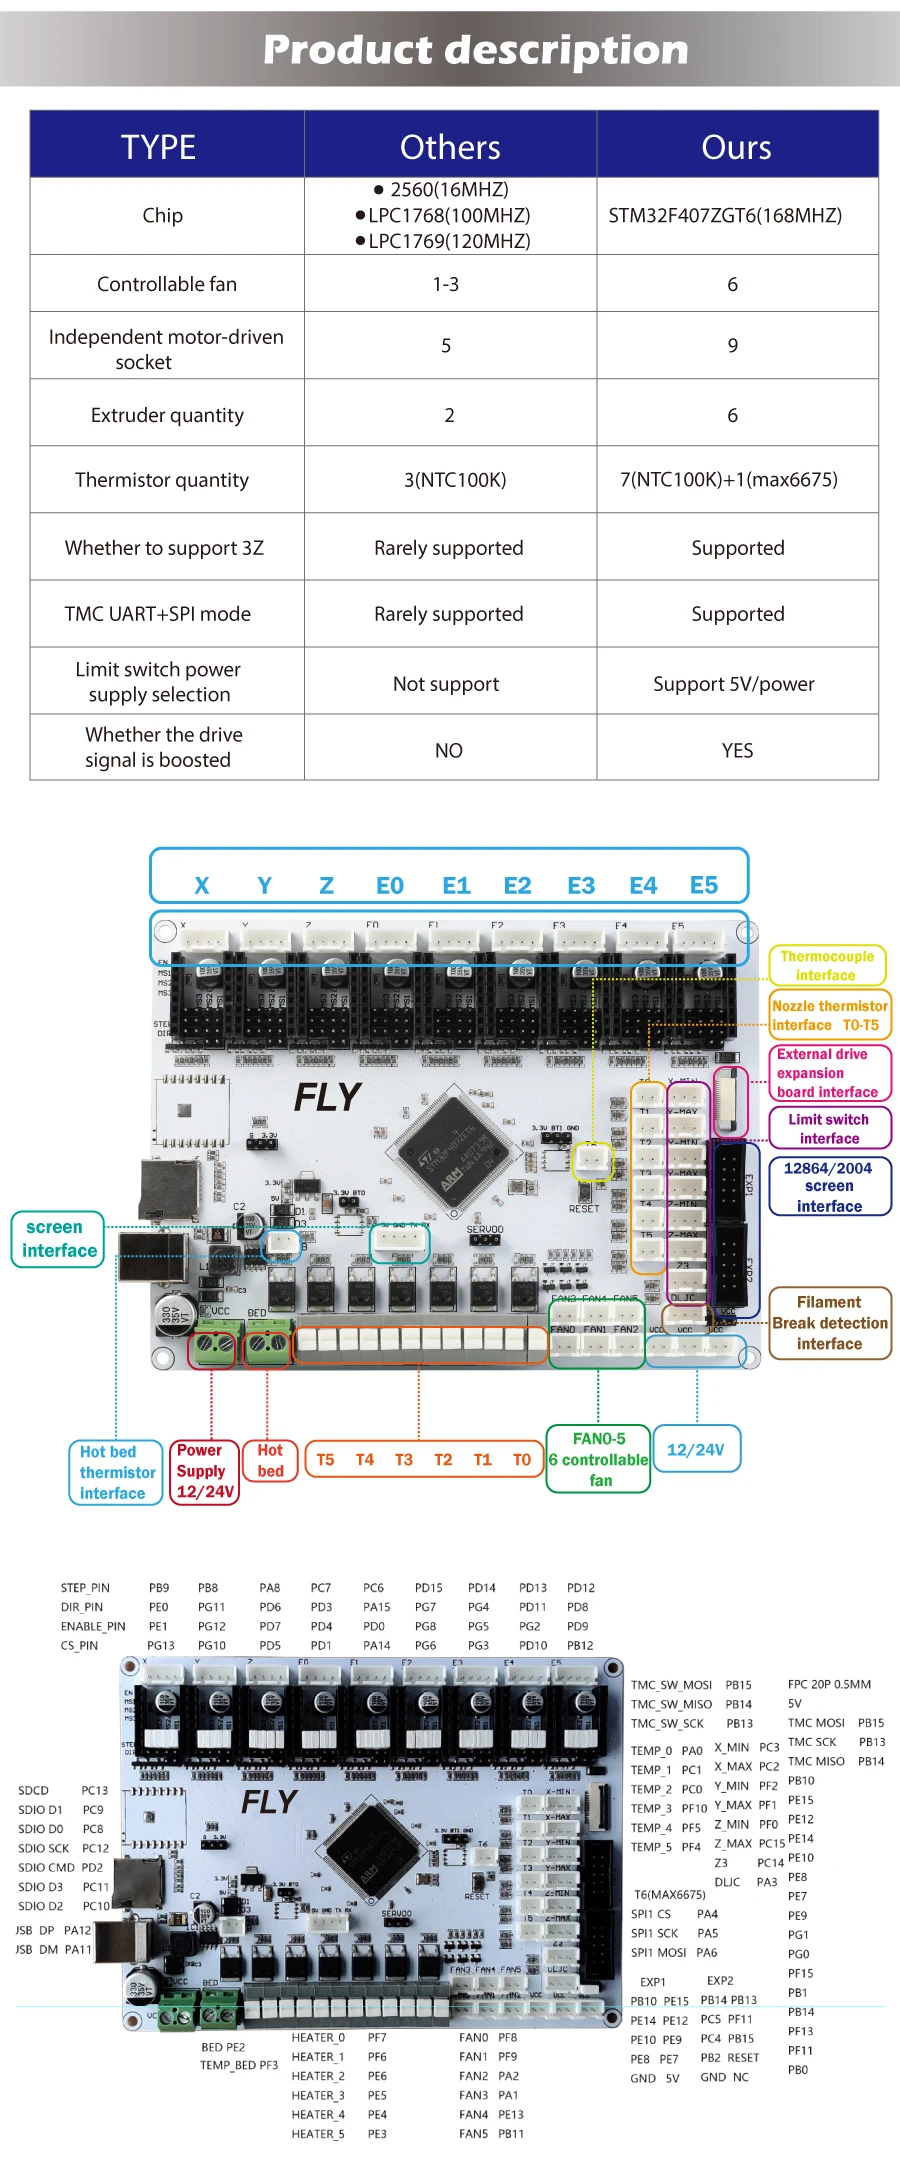
32-bit ARM Cortex-M4 series 168 MHz, STM32F407ZGT6 chip
Firmware: Marlin 2.0
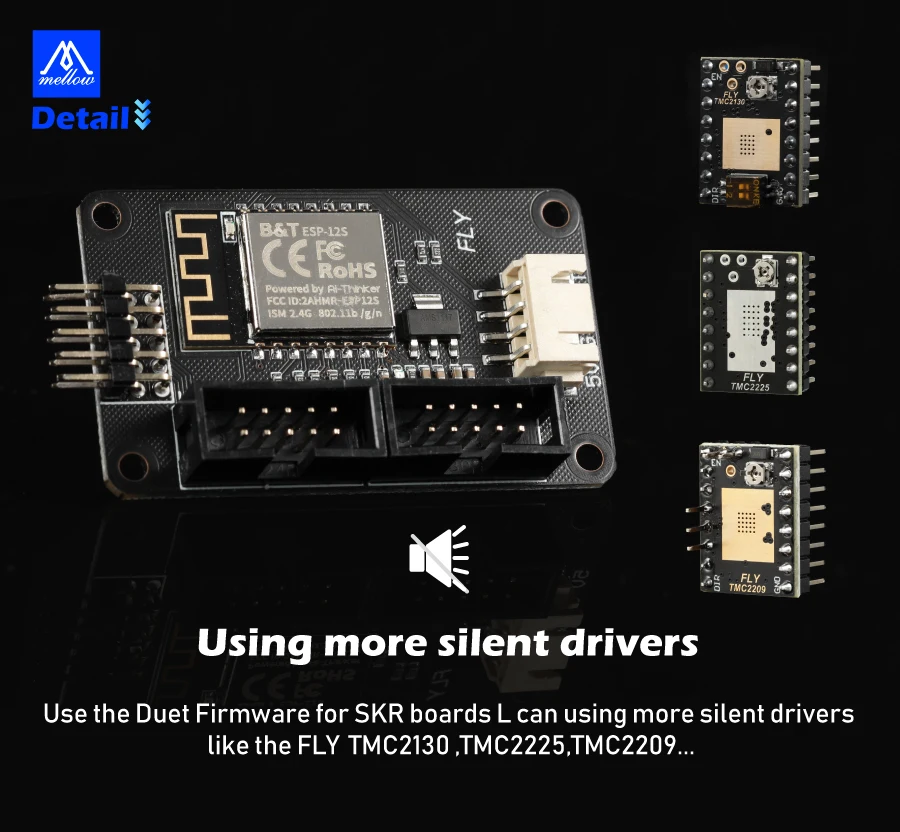
Driver support: A4988, LV8729, DRV8225, TMC2208 / 2209, etc.
Drive mode support: TMC: UART / SPI
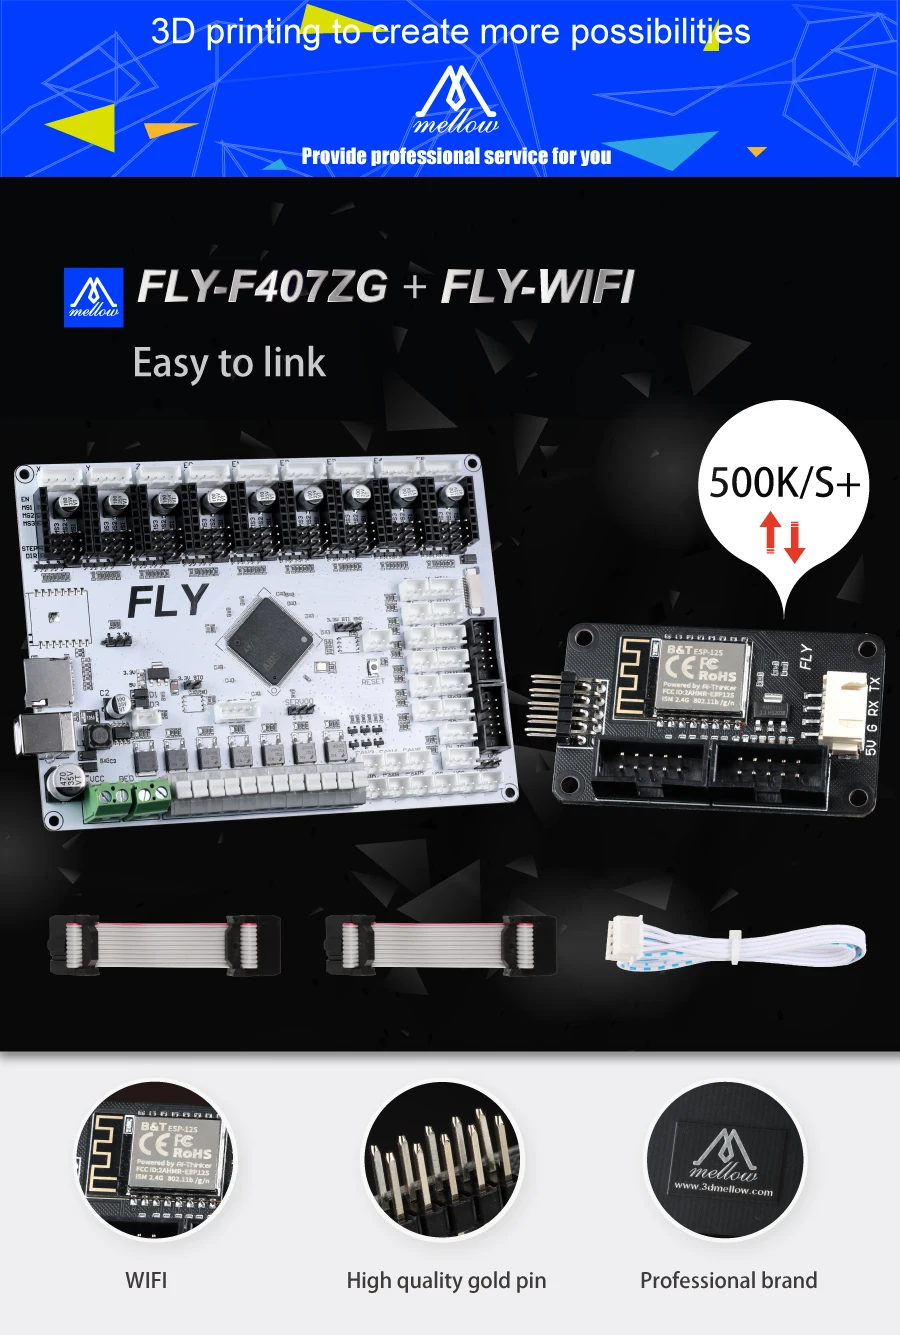
Support 9 independent motor drives, 6 extruders, 6 controllable fans, 3 uncontrollable fan sockets.
Reserve one FPC drive expansion socket, can also expand 3 additional stepper motors
Display: serial touch screen, 12864 LCD, 2004 LCD ,FLY 4.3/7.0 V1
Support automatic bed leveling sensor: BLTouch
Supports dual Z-axis printers and three Z-axis printers (the motherboard has a dedicated Z3 limit switch interface).
Support printer structure: XYZ, kossel, ultimaker, corexy, etc.
Input voltage: DC12V-DC24V
Motor driver interface: X Y Z E0 E1 E2 E3 E4 E5
Temperature sensor interface: B, T0, T1, T2, T3, T4, T5, T6 (MAX6675 chip is not soldered by default) A total of 7 NTC 100K thermistor interfaces and one SPI thermocouple interface
Supports one servo interface and one material detection module interface
Optional limit switch power supply: 5V / 12V / 24V
The heating rod interface uses screw-free push-type terminals for quick and easy connection.
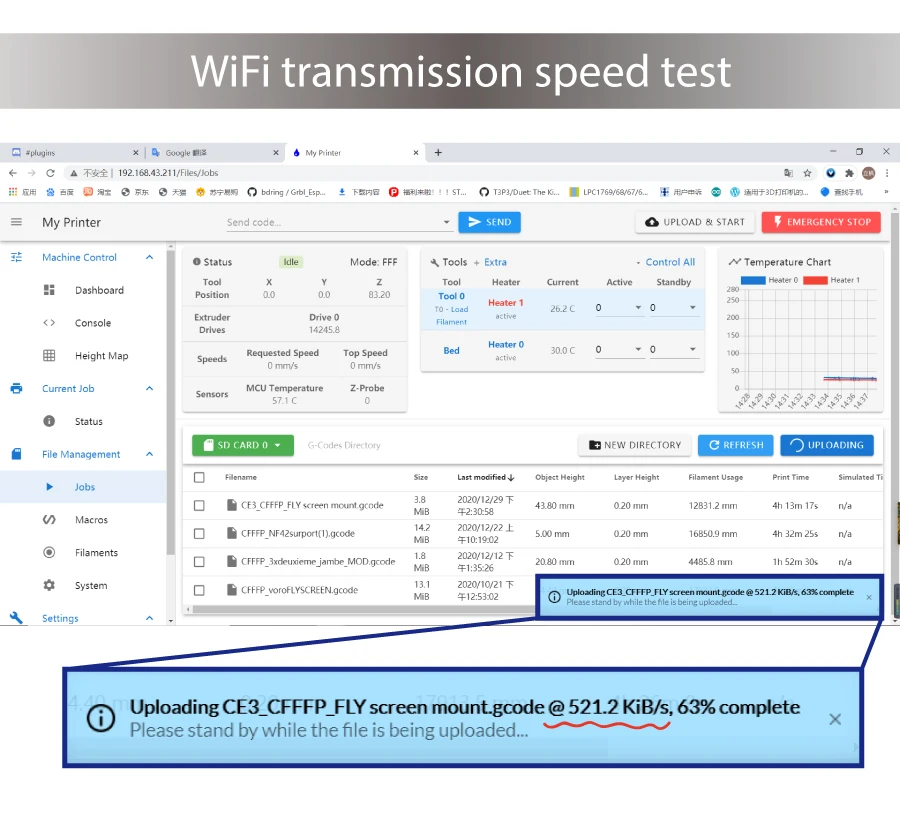
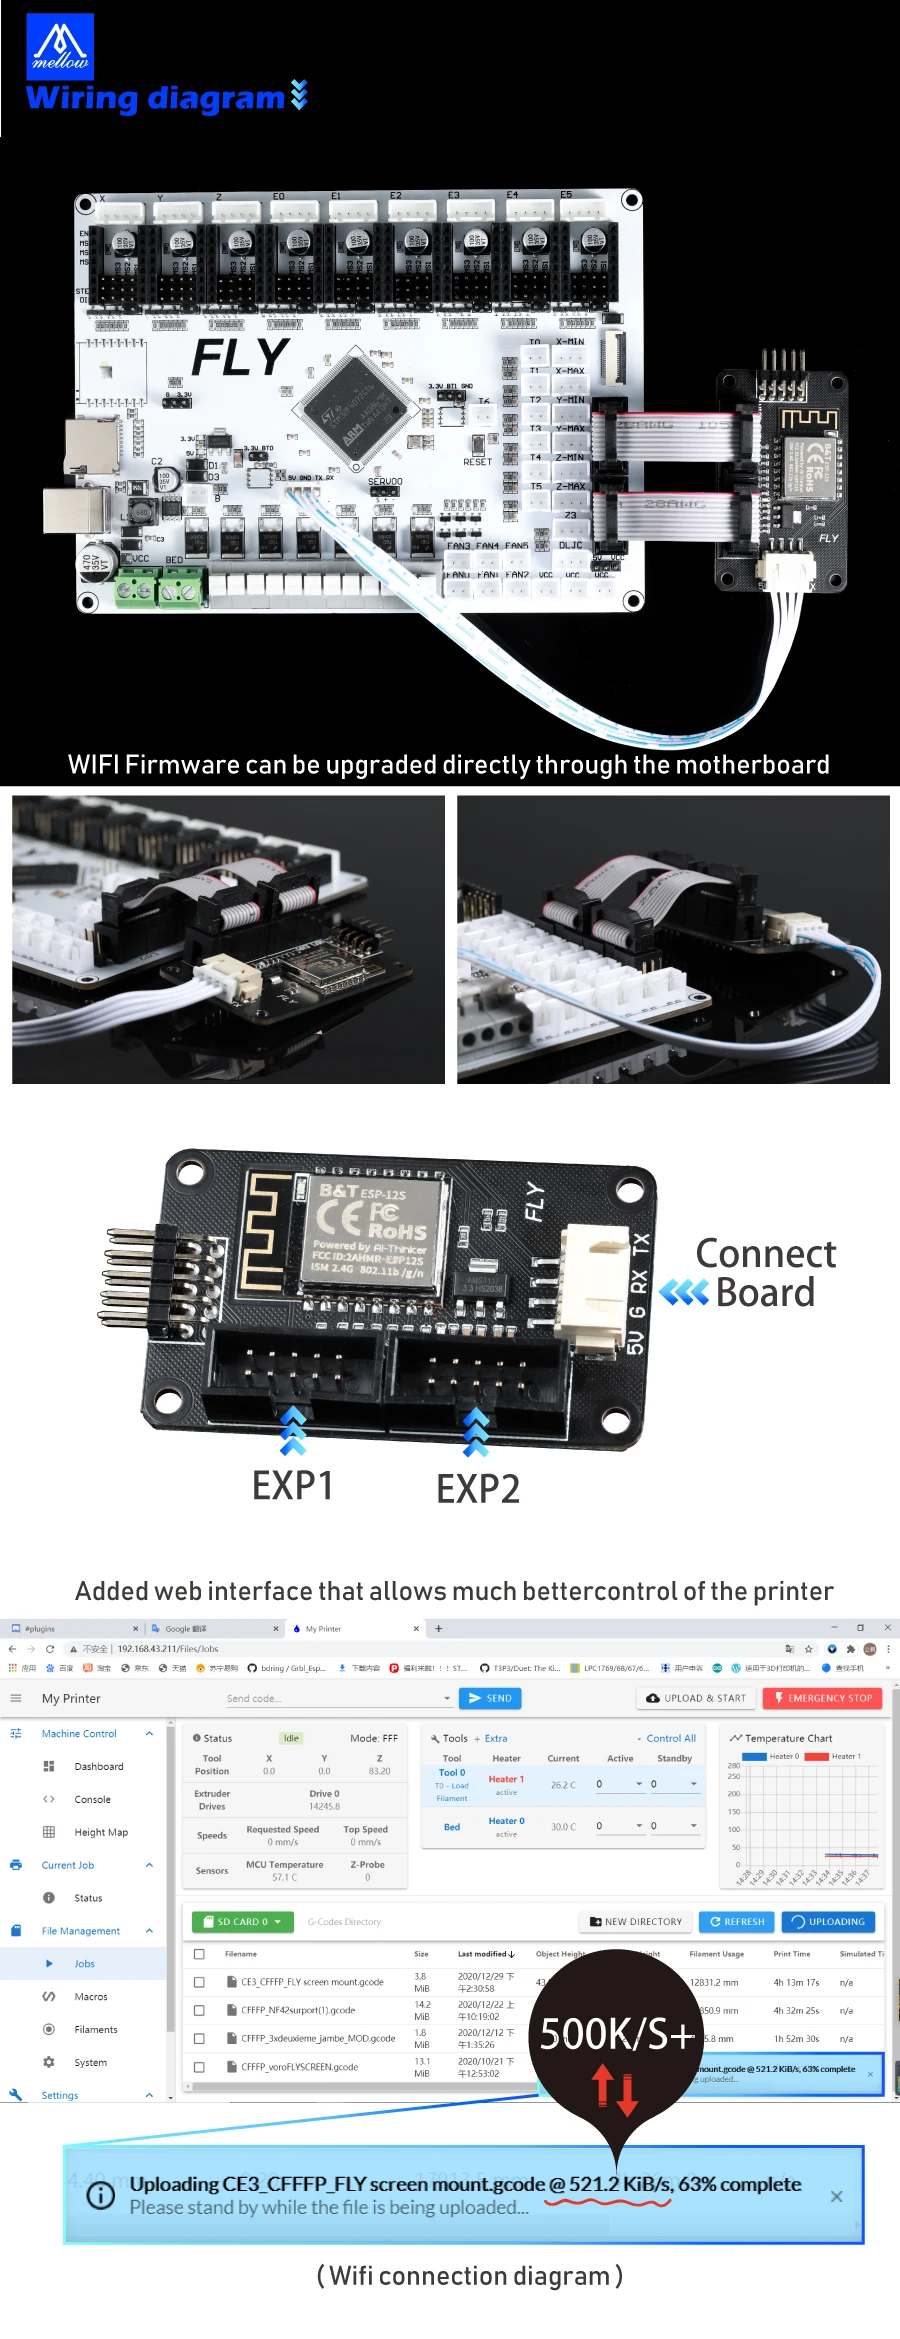
Connecting to the wifi module can use 500k+ wireless transmission and wireless control functions
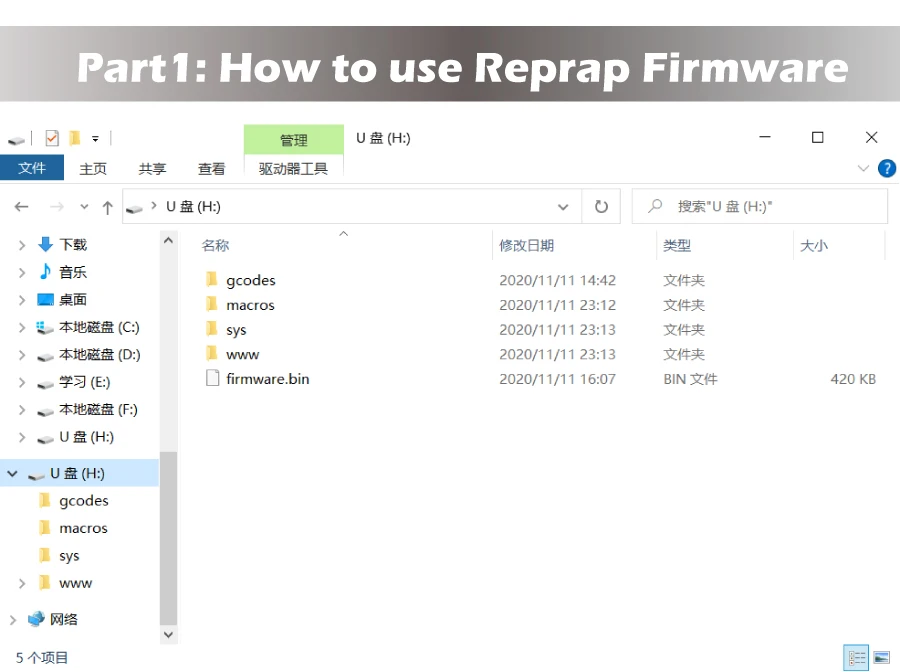
Part1: How to use Reprap Firmware
First, download the firmware package on FLYmaker's github
Download the firmware package for the corresponding motherboard
FLY-F407ZG:https://github.com/FLYmaker/FLYF407ZG
Further reading on LPC and STM32:https://github.com/gloomyandy/RepRapFirmware/wiki
Download FLY's github file package for first-time use
Copy the files in the RepRap firmware folder to the root directory of the SD
2. Insert the SD card into the motherboard
3. Restart/Reboot/Re-power the motherboard
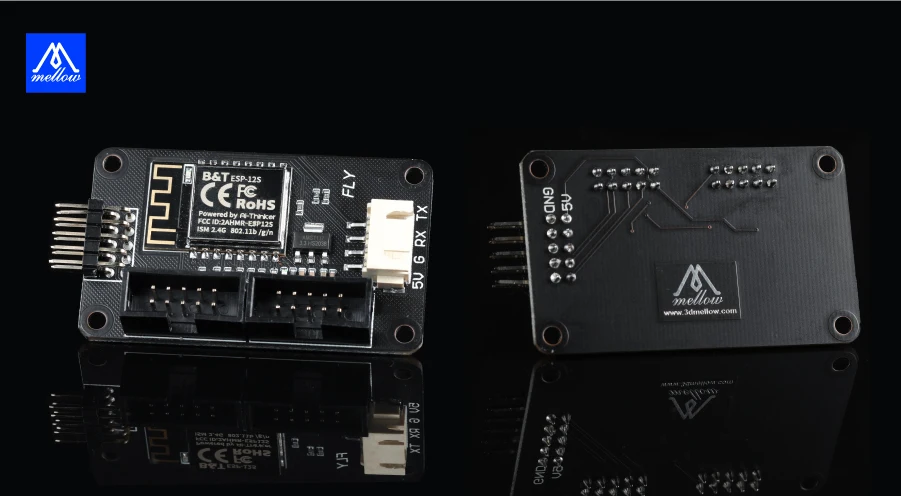
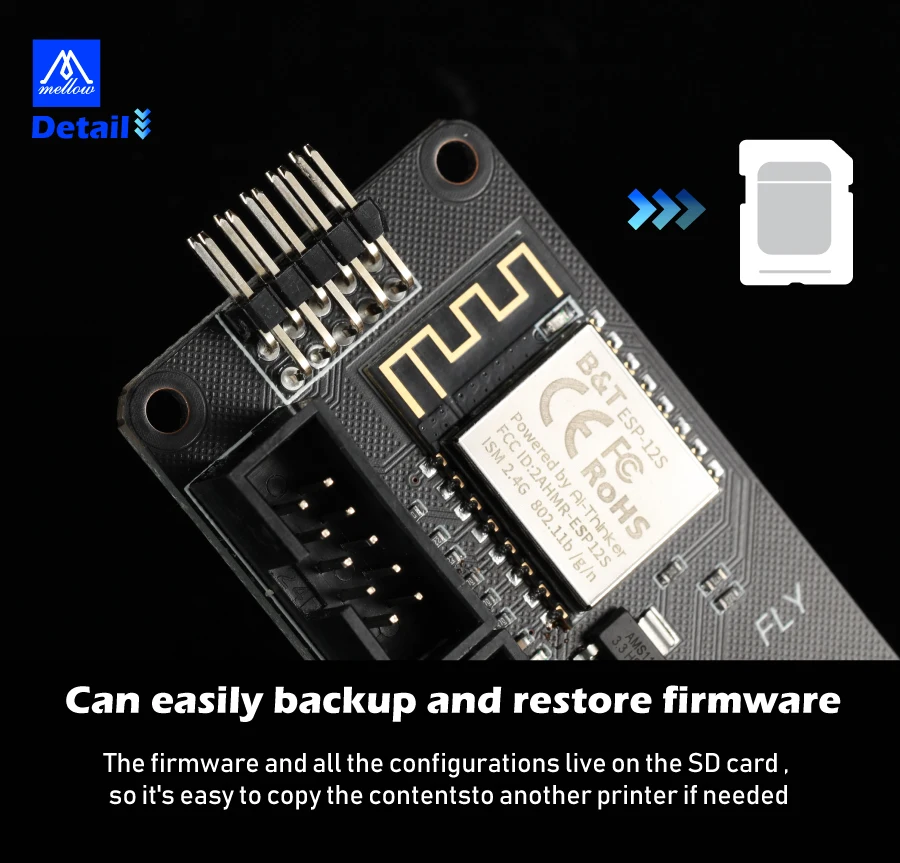
4. Plug all the pins around the wifi module as shown in the figure:
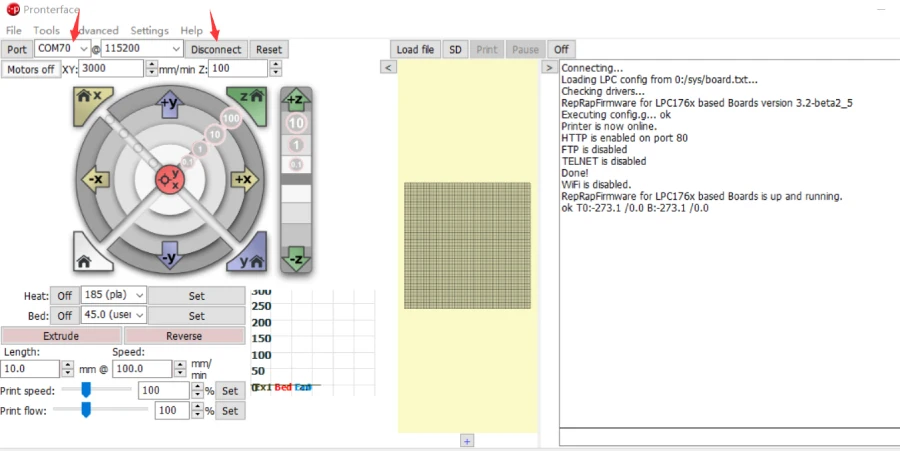
5. Open the terminal software(Pronteface), select the port and click connect
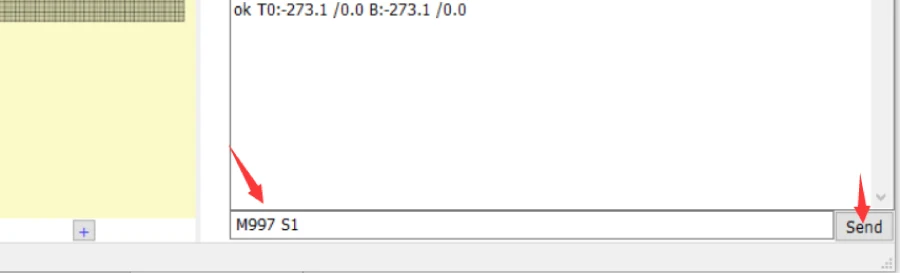
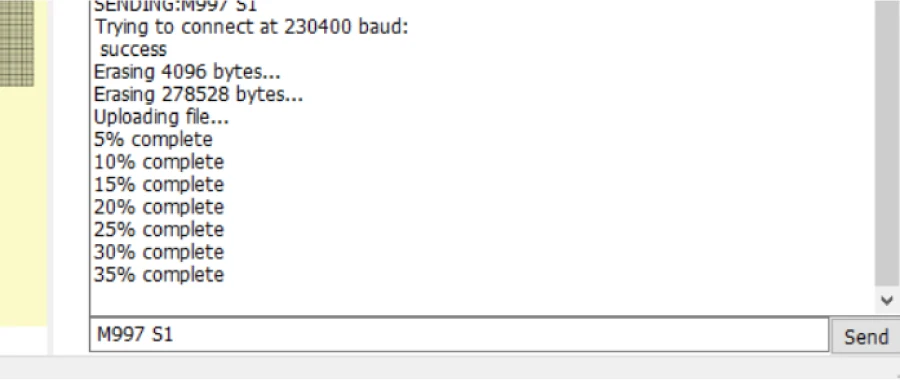
6. Enter M997 S1 in the lower right corner, and then click send
7. This step is to burn the motherboard wifi program
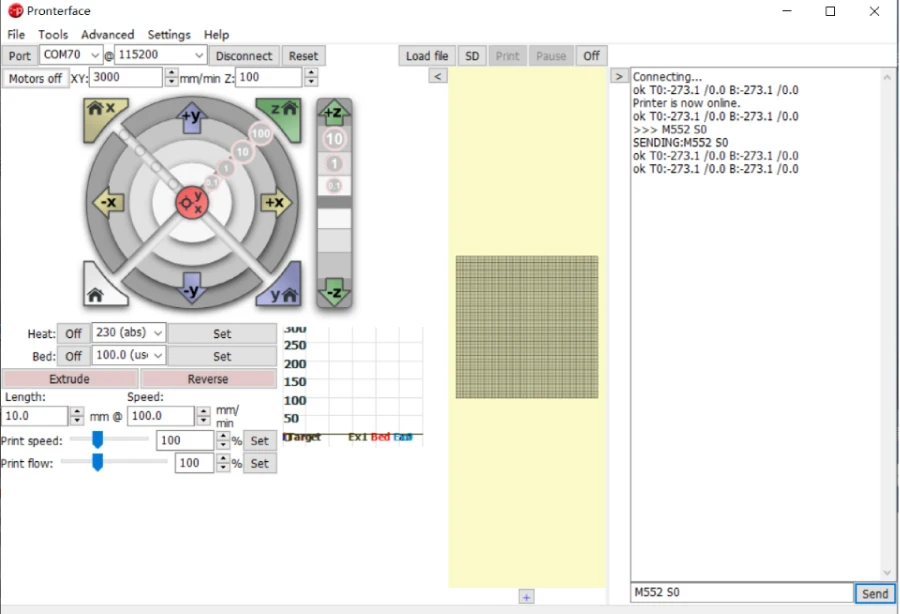
8. After programming is complete, send M552 S0 command to put wifi in idle mode
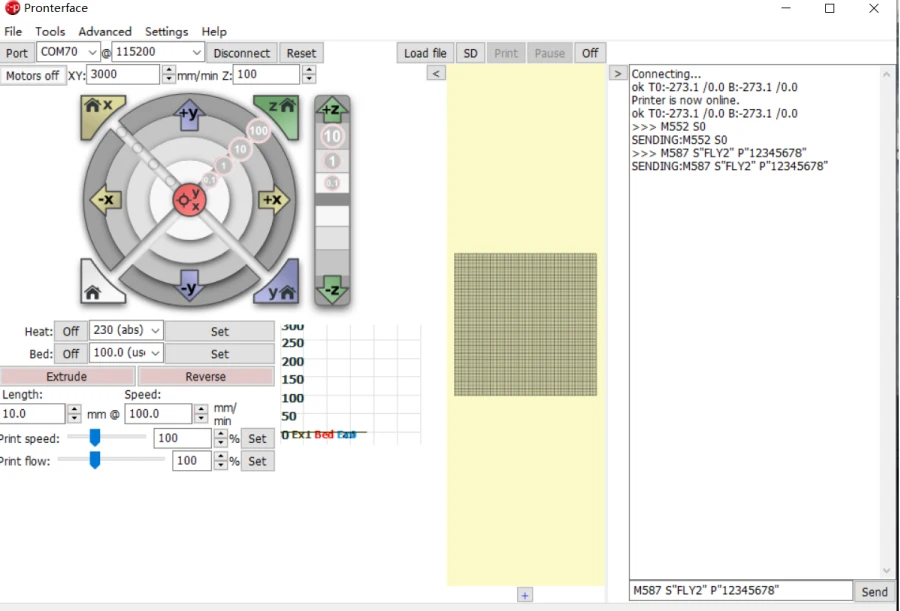
9.Send M587 S"WIFI name" P"WIFI password" command
(The system will automatically remember the WIFI name and password)
Important Note:
If your wifi password containslowercase, please add (') before the letter to configure according to the following example:
Example 1
WIFI name: FLY2
WIFI password: fly12345
Send as:
M587 S"FLY2" P"'f'l'y12345"
Example 2
WIFI name: FLY2
WIFI password: 12345678
Send as:
M587 S"FLY2" P"12345678"
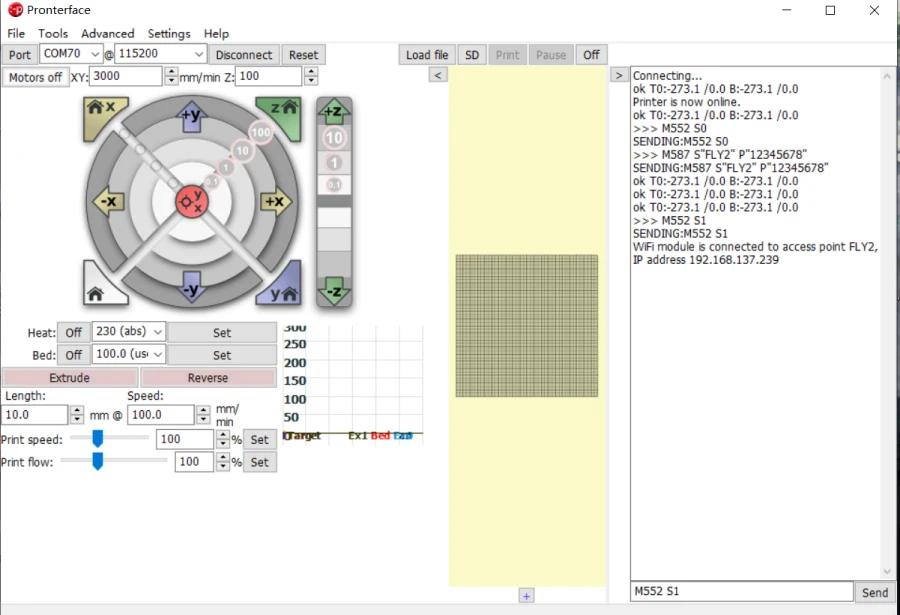
1.send M552 S1, to turn on the network connection
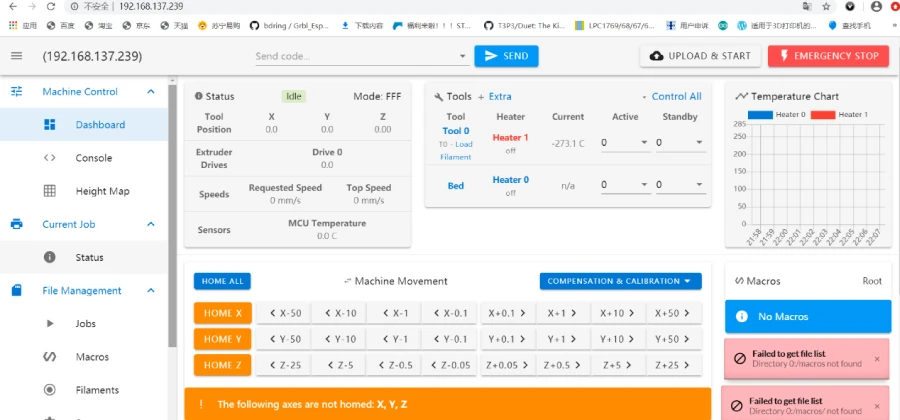
11. Enter the Printer IP address into the web browser
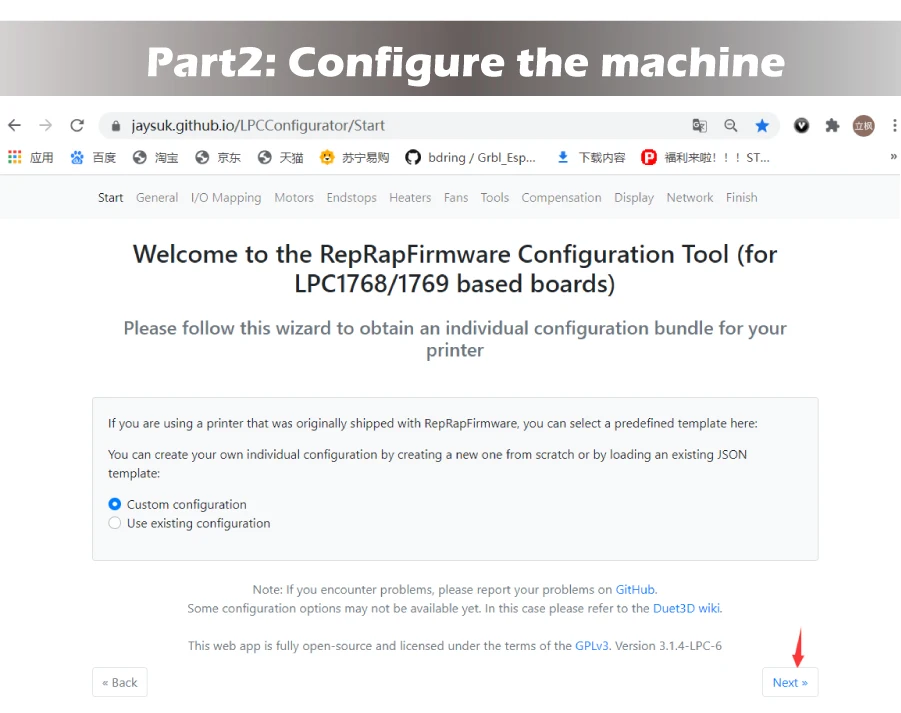
Part2: Configure the machine
https://jaysuk.github.io/LPCConfiguratorOpen this URL with a browser
1. Choose motherboard:Fly-f407zg
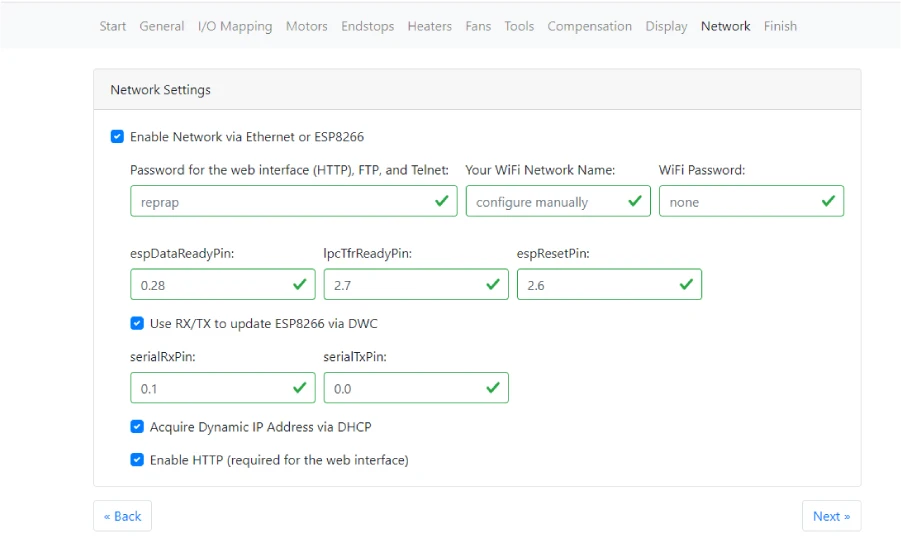
Important Note:
Other settings are based on your own machine and network configuration.
Just edit the values in thegreen boxas shown in the diagrams, and other configurations are not
required
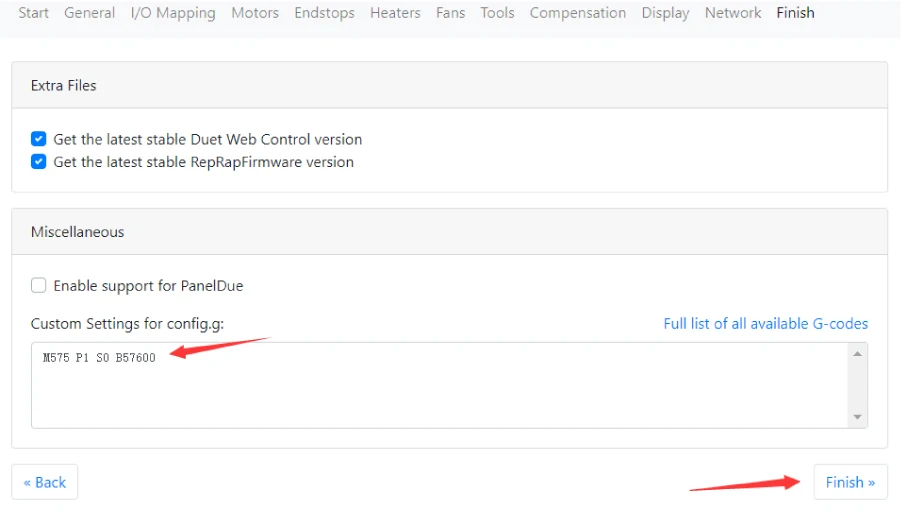
2. If you have a FLY touch screen, put this command in Custom Settings for config.g:M575 P1 S0 B57600
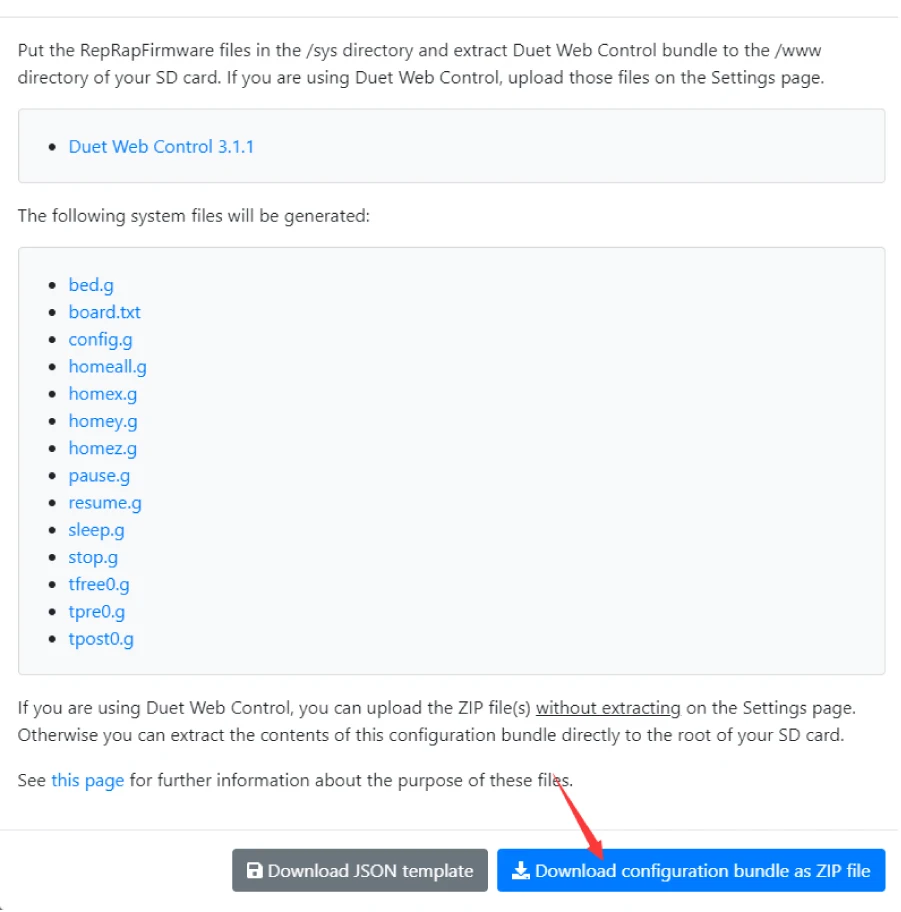
3. Download the generated file: